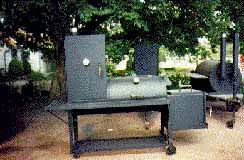
.comment-link {margin-left:.6em;}

WhiteTrashBBQ

WhiteTrash BBQ -- Real Pit Barbecue from New York City. This is the story of a fire obsessed guy, living in Brooklyn, with a dream of producing award winning, competition busting, real Barbeque. Come live the dream as I compete around the country in the KCBS Championship Barbecue circuit.

Tuesday, November 16, 2010

Thanksgiving Recipes: Michael Voltaggio's Turkey Brine
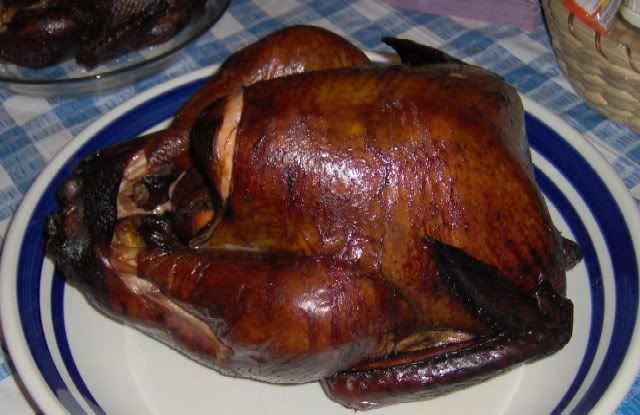

Recently I had the good fortune to stumble upon a Williams-Sonoma technique class for a "Contemporary Thanksgiving." While that class focused on an incredible sous vide then deep fried turkey, it did give up one technique that the outdoor cook can use for this Thanksgiving - brining. If you're going to smoke (like the bird pictured above,) fry or grill your bird it will benefit greatly from a little brine!

Brining is an age old secret technique used to add moisture and flavor to meats. I usually save my brining for poultry, but it can be used on just about any meat. OK, so brining adds moisture and flavor but how does it work? Darned if I know. There's a few theories and you can read about them on The Virtual Weber Bullet. Go ahead, it's a good read. I'll still be here when you get back.

So with all that contridictory information filling your head - are you ready to brine? I'll bet you are. Without further ado, here's Michael Voltaggio's Turkey Brine.

Ingredients:
  • 21⁄2 gallons (10 l) water
  • 1⁄4 cup (23g) whole cloves
  • 1⁄4 cup (32g) peppercorns
  • 1⁄4 cup (18g) coriander seeds
  • 1⁄4 cup (23g) allspice berries
  • 1⁄4 cup (41g) yellow mustard seeds
  • 21⁄2 cups (625g) kosher salt
  • 21⁄2 cups (545g) firmly packedlight brown sugar
  • 2 each grapefruits, oranges,lemons and limes, halved and juiced, rinds reserved
Method:
In a large stockpot over high heat, combine the water, spices, salt and brown sugar. Bring to a boil and simmer for 5 minutes. Add the citrus juices and rinds. Refrigerate the brine until thoroughly chilled. Place the turkey into the cold brine and refrigerate for 24 hours. Make sure the turkey is full submerged in the brine.

This recipe makes enough brine for a 10 to 12lb turkey. Need more brine - increase the ingredients proportionately, based on the size of your bird. Don't just up the water content.

One last note: Don't try this on a Butterball or any other enhanced turkey. Use a natural "no added ingredients" bird. Check the label - the only ingredient should read TURKEY

Labels: , , , , , , , , , ,

Monday, November 15, 2010

Thanksgiving Is Coming!

Yes, Thanksgiving is just down the road, so from now until the big day, I'll be focusing on recipes for your Thanksgiving feast that can be cooked on a grill, smoker, fryer or other outdoor cooking device. Live fire cooking is what it's all about here!

Today we'll start with an appetizer; Marinated Portabello Mushrooms with Asiago Cheese. This recipe comes to us from the fine folks at Weber, was created by the talented Jamie Purviance and is published in Weber's Way to Grill. Portabello Mushrooms are so large and "meaty", they could serve as a first course to your crazy vegetarian friends and relations! You've been warned son.


Marinated Portabello Mushrooms with Asiago Cheese

Marinade:
  • 1/4 cup extra-virgin olive oil
  • 3 tablespoons balsamic vinegar
  • 1 tablespoon soy sauce
  • 1 teaspoon chopped fresh rosemary leaves or 1/2 teaspoon dried crushed rosemary
  • Kosher salt
  • Ground black pepper
Main Ingredients:
  • 6 large portabello mushrooms, each 5 to 6 inches in diameter
  • 3/4 cup fresh bread crumbs
  • 1 tablespoon finely chopped fresh Italian parsley leaves
  • 1-1/2 cups grated Asiago cheese
Directions:

1. In a small bowl whisk the marinade ingredients, including 1/2 teaspoon pepper and 1/4 teaspoon salt.

2. Wipe the mushrooms clean with a damp cloth or paper towel.
Remove and discard the stems. With a teaspoon, carefully scrape out and discard the black gills from the mushroom caps. Place the mushrooms, cap sides up, on a rimmed plate and brush them with the marinade. Turn the mushrooms over and brush again with the marinade. Let marinate at room temperature for 15 to 20 minutes.

3. Prepare the grill for direct cooking over medium heat (350° to 450°F).

4. In a small bowl combine the bread crumbs with the parsley.

5. Brush the cooking grates clean. Grill the mushrooms, gill sides down, over direct medium heat, with the lid closed, until the mushrooms begin to soften, 4 to 6 minutes. Brush the cap sides with some of the remaining marinade from the plate, turn them over, add 1/4 cup of cheese on top of each mushroom, close the lid, and cook until tender when pierced with a knife, 4 to 6 minutes. During the last minute of cooking, place the bread crumb mixture evenly on top of each mushroom. Remove from the grill, season with salt and pepper, and serve immediately.

Serves 6

Labels: , , , , , , ,

Thursday, November 11, 2010

BBQ Recipes: Pecan Smoked Sugarcane BBQ St. Louis Ribs

This recipe comes to us from the Commander's Palace Destin in Destin, Florida. This makes a ton of rub and a boat load of sauce, but damn it's good. Pecan shells, or pecan wood if you can find it make a wonderful smoke that just works wonders on Pork. Can't find pecan? Oak or Hickory work just as well.

BBQ Spice Rub Ingredients:
  • 3 cups paprika
  • 1 cup granulated onion
  • 1 cup granulated garlic
  • ¼ cup white pepper
  • 1 cup lemon pepper
  • 1 cup chili powder
  • 1 cup black pepper
  • ¼ cup cayenne pepper
  • 1 tbsp allspice
  • 1 tbsp cumin
  • ¼ cup dried thyme
  • 1 tbsp dried marjoram
  • 2 cups kosher salt
  • 1/3 dry mustard
  • 1 tbsp rubbed sage
  • 1 tbsp ginger
  • 1 tbsp mace
  • 2 pounds brown sugar, light
  • ½ cup cornstarch

Steps: Mix all ingredients together thoroughly

Chipotle Sugarcane BBQ sauce Ingredients:
  • ¼ cup butter
  • 1 cup yellow onion chopped
  • 1 cup green bell pepper chopped
  • 3 oz. chipotles in Adobo
  • ¼ cup garlic, minced
  • 2 tbsp chili powder
  • 1 ½ tsp black pepper
  • 1 ½ tsp allspice
  • 1 ½ tsp cumin
  • 1 tbsp dried thyme
  • 1 ½ tsp dried oregano
  • 1 tbsp kosher salt
  • 3 ½ cups ketchup
  • 3 ½ cups crushed tomato
  • 1 ½ cups Dijon mustard
  • 1 pound brown sugar
  • ¾ cup Worcestershire Sauce
  • 1 cup sugarcane vinegar
  • ½ cup red wine vinegar
  • ½ cup lemon juice
  • 3 ½ cups sugarcane syrup

Steps:
Melt butter in a heavy bottom sauce pan. Add onions and peppers and sauté until translucent. Add garlic and sauté about 5 minutes. Puree chipotles in a food processor with about ½ cup of water until smooth. Add chipotle puree and spice to the pot and cook about 5 minutes. Add the remaining ingredients and bring to a simmer. Simmer about 30 minutes.

Pecan Smoked Sugarcane Barbequed St. Louis Ribs Ingredients:
  • 4 full racks St. Louis style ribs
  • BBQ spice rub
  • BBQ sauce
  • Whole pecans or pecan shells

Steps:
To prepare ribs peel the thin membrane off the back side of the ribs. Then rub both sides of each rack of ribs with ¼ cup of the spice rub. Let marinate for 8 to 24 hours. Preheat smoker to 225 degrees. Add the pecans or pecan shells to the fire. Cook ribs bone side up for two hours. Flip the ribs and smoke for 3 more hours. Slather both sides of each rack with BBQ sauce and let cook another 20 -30 minutes with sauce. Cut and serve.

Labels: , , , , , ,

Friday, October 08, 2010

Grilling Recipes: Pork Paillards with Romesco Sauce

Here at WhiteTrash BBQ Romesco sauce is one of those sauces that I never make on the spur of the moment. It's almost a forgotten sauce. I've never grilled a piece of chicken and thought, "Oh, this needs some Romesco sauce!" And that's a shame. Every time I eat something with Romesco sauce I'm reminded how much I like it.

Jamie Jamie Purviance recipe from Weber's Way to Grill™ served up that reminder to me this week. Try it out!

Pork Paillards with Romesco Sauce


Ingredients:
4 boneless center-cut pork chops, each 6 to 7 ounces and
about 1 inch thick
Extra-virgin olive oil
Kosher salt
Ground black pepper
8 small leeks, no wider than 1 inch in diameter (optional)

Sauce:
3/4 cup roughly chopped roasted red bell pepper
1/3 cup slivered almonds, toasted
1 tablespoon ketchup
1 tablespoon extra-virgin olive oil
1 tablespoon fresh lemon juice
1 teaspoon roughly chopped garlic
1/2 teaspoon paprika
1/8 teaspoon ground cayenne pepper

1 tablespoon finely chopped fresh Italian parsley

1. Butterfly each chop from the fat side and trim them of excess fat. One at a time, place each chop between 2 sheets of plastic wrap and pound to an even 1/4-inch thickness. Lightly brush or spray the paillards with oil and season all sides with salt and pepper.

2. Remove the dark green tops off of each leek, cutting about 2 inches above the point where the leaves begin to darken. Trim just enough of each root end to remove the stringy parts, but leave enough of each root end so the layers remain attached. Cut each leek in half lengthwise. Remove the tough outer leaves on each leek. Rinse the leeks under water, opening up the layers to remove any dirt. Pat dry. Lightly coat the leeks with oil and season to taste with salt and pepper.

3. Prepare the grill for direct cooking over low heat (250° to 350°F).

4. Brush the cooking grates clean. Grill the leeks over direct low heat, with the lid closed as much as possible, until softened and slightly charred on all sides, 15 to 20 minutes, turning every couple of minutes for even cooking, and moving over indirect heat if the leeks become too dark before they are tender.

5. In a food processor combine the sauce ingredients. Pulse until you get a semi-smooth consistency. Season to taste with salt.

6. Increase the temperature of the grill to high heat (450° to 550°F). Brush the cooking grates clean. Grill the paillards over direct high heat for about 3 minutes on the first side, turning when the meat is nicely marked. The second side will need only a minute to finish cooking.

7. Transfer the paillards, with the first grilled side facing up, to a serving platter or individual plates. Divide the sauce evenly and spoon over the meat. Arrange two leeks on top of each paillard. Garnish with some parsley over the top.

Labels: , , , , , , ,

Thursday, September 16, 2010

Meatloaf on the Kettle - Part Deux


I mentioned a little while back that Julie from She Smoke inspired me to cook some meatloaf on the Weber Kettle. Now I don't usually make meatloaf, but Julie's comments about the "a few dried herbs and an egg to a hunk of ground beef, shaped it into a loaf, poured over a bottle of ketchup and cooked until well done," meatloaf of her youth peaked my interest. We certainly have a shared memory there!

Her new recipe for a tasty modern meatloaf, inspired me to take a crack at one of my least favorite childhood dishes. Hell, if Julie could do it, so could I. So I gathered the ingredients, most of which I had in the house and set out to conquer Meatloaf On The Kettle! Now I don't know about you, but I rarely follow recipes. In this case I made a conscience decision to follow Julie's instructions to the letter.

Take a minute and read Julie's recipe here. Don't worry, I'll be here when you get back....

Got that down? Good.

So I gathered my vegetables, trimmed them, chopped them, whipped them and mixed the meat and was left with two ingredients; the bread crumbs and the milk. This certainly had to be an over-site on my part so, I reread the recipe and found no instruction on what to do with the bread crumbs and the milk. What do I do with these rogue ingredients?

I called out to my wife and asked her what to do with them. She resisted the urge to tell me what I REALLY could do with them and she sat down and read the recipe. "They're not mentioned," she tells me. "But I would add them to the mix. Breadcrumbs are always in meatloaf, but I'm not sure what to do with the milk."

What was I going to do with this stuff? Julie had mentioned in her post that this recipe was "based on my recipe in She-Smoke (Not Your Mama's Meatloaf, pg. 164)," so I got out the book and read that recipe. "Oh, soak the breadcrumbs in the milk." Wait a minute, I'm using store bought canned bread crumbs. Soak them in the milk?

After some discussion with the wife, I dump the breadcrumbs into the meat mixture and about 1/2 of the milk. This made the wettest pile of meat I've ever encountered for a meatloaf. I let the meat mixture sit as I build my fire. I get the kettle settled at 300 degrees and return to the kitchen to shape the loaves.

Julie suggested making smaller loaves instead of one large one, so I fashion four loaves from the pile of meat. The meat mixture is light and airy and extremely moist. So much so, it has a hard time coming together. I resist the urge to add more bread crumbs, and work to roughly get the meat settled into an approximate loaf shape.

They go on the kettle, cook for a little more than an hour and come off as some of the tastiest meatloaf I've ever had. Thank you Julie! A couple of things, you'll notice that the meat is pretty craggy (is that even a word?) While the cracks and crevices did add to the outer layer's crunch, next time I'll work to smooth the loaves. In a re-heat of the leftovers a glaze was a much needed and nice touch.

Labels: , , , , ,

Tuesday, August 31, 2010

And Now For Something Completely Different: The Mind Kitchen

I mentioned earlier that I was a guest on one of New York's most incredibly hip and underground radio shows, The Mind Kitchen. Well, it's finally available on line.

On this episode of Mind Kitchen Matt Timms sits down Robert Fernandez of Grillin' on the Bay BBQ Contest, painter and fine artist Matthew Langland and John Hoppin, musician and bigwig at Heritage Foods USA. Don't miss this special Iron Maiden-laden, prize-packed episode of the greatest game show ever to take place entirely within your mind. This episode was sponsored by Barterhouse: one of NYC's best importers of wine.

This was a real blast. (Do the kids still say blast?) I had a great time dishing up one of the most, shall we say exotic, meals in my repertoire. Have a listen here.

Labels: , , , , , , , , , , , , ,

Friday, July 09, 2010

BBQ Recipes: Jerk Chicken Skewers with Honey-Lime Cream


Here's another great recipe by Jamie Purviance from his cookbook, Weber's Way to Grill. Try this out. It was really really good.

Jerk Chicken Skewers with Honey-Lime Cream

Paste
1 habanero or Scotch bonnet chile pepper
1 cup lightly packed fresh cilantro leaves and tender stems
1/2 cup extra-virgin olive oil
4 scallions (white and light green parts only), roughly chopped
6 medium garlic cloves
2 tablespoons finely chopped fresh ginger
2 tablespoons granulated sugar
1 tablespoon fresh lime juice
1 tablespoon ground allspice
2 teaspoons kosher salt
1 teaspoon ground black pepper

6 boneless, skinless chicken breast halves, 6 to 8 ounces each

Sauce
1/2 cup sour cream
1/2 teaspoon finely grated lime zest
1 tablespoon fresh lime juice
1 tablespoon extra-virgin olive oil
2 teaspoons honey
1/4 teaspoon kosher salt
1/8 teaspoon ground black pepper

1. To avoid burning your skin, wear rubber or plastic gloves when you handle the chile. After handling the chile, do not touch your face or any other part of your body, as that might cause a burning sensation. Remove and discard the stem of the chile, then cut away and discard the hot whitish veins and seeds. Put the rest of the chile in the bowl of a food processor. Add the remaining paste ingredients and process until smooth.

2. Trim the chicken of any fat and remove the tenders. Cut the chicken lengthwise into even strips, 1/2 to 3/4 inch thick.

3. Place the chicken strips and tenders into a large, resealable plastic bag and spoon in the paste. Work the paste into the chicken, press out the air in the bag, and seal tightly. Place in the refrigerator and let marinate for 2 to 3 hours.

4. In a small bowl whisk the sauce ingredients. Cover with plastic wrap and refrigerate. Let the sauce stand at room temperature for about 30 minutes before serving. Prepare the grill for direct cooking over high heat (450° to 550°F).

5. Wearing rubber or plastic gloves, thread the chicken strips onto the skewers, being sure to keep each skewer well within the flesh of the chicken. If you don’t have rubber gloves, be sure to wash your hands thoroughly after this step.

6. Brush the cooking grates clean. Grill the skewers over direct high heat, with the lid closed as much as possible, until the meat is firm and the juices run clear, 6 to 8 minutes, turning once or twice. Serve warm with the sauce.

Labels: , , , , , , ,

Friday, July 02, 2010

BBQ Recipes: Classic Baby Back ribs


This recipe comes to us from the fine folks at Weber. It's written by Jamie Purviance and you can find it in his cookbook, Weber's Charcoal Grilling™. Now I haven't tried this recipe yet, but I plan on trying it out soon.

Rub
  • 2 tablespoons kosher salt
  • 2 tablespoons paprika
  • 4 teaspoons granulated garlic
  • 4 teaspoons pure chile powder
  • 2 teaspoons ground black pepper
  • 1 teaspoon ground cumin
4 racks baby back ribs, 2 to 2-1/2 pounds each
4 medium chunks of hickory wood, soaked in water for at least 30 minutes

Barbecue sauce
  • 3/4 cup apple juice
  • 1/2 cup ketchup
  • 3 tablespoons cider vinegar
  • 2 teaspoons soy sauce
  • 1 teaspoon Worcestershire sauce
  • 1 teaspoon molasses
  • 1/2 teaspoon pure chile powder
  • 1/2 teaspoon granulated garlic
  • 1/4 teaspoon ground black pepper
Mop
  • 1 cup apple juice
  • 3 tablespoons cider vinegar
  • 2 tablespoons unsalted butter
  • 2 tablespoons barbecue sauce (from above)
1. In a small bowl mix the rub ingredients.

2. Using a meat thermometer or dull knife, slide the tip under the membrane covering the back of each rack of ribs. Lift and loosen the membrane until it breaks, then grab a corner of it with a paper towel and pull it off. Season the ribs all over, putting more of the rub on the meaty sides than the bone sides. Arrange the ribs in a rib rack, with all the ribs facing the same direction. Allow the ribs to stand at room temperature for about 30 minutes, or until the surface looks moist, before grilling.

3. Fill a chimney starter to the rim with charcoal and burn the charcoal until it is lightly covered with ash. Spread the charcoal in a tightly packed, single layer across one-third of the charcoal grate. Place a large disposable drip pan on the empty side of the charcoal grate. Fill the pan about halfway with warm water. Let the coals burn down to low heat (250° to 300°F). Leave all the vents open.

4. When the fire has burned down to low heat, drain 2 hickory chunks and place them on top of the charcoal. Put the cooking grate in place. Place the rib rack over indirect low heat (over the drip pan) as far from the coals as possible, with bone sides facing toward the charcoal. Close the lid. Close the top vent about halfway. Let the ribs cook and smoke for 1 hour. During that time, maintain the temperature between 250° to 300°F by opening and closing the top vents. Meanwhile, make the sauce and the mop.

5. In a small saucepan mix the barbecue sauce ingredients. Simmer for a few minutes over medium heat, and then remove the saucepan from the heat.

6. In another small saucepan mix the mop ingredients. Simmer for a few minutes over medium heat to melt the butter, and then remove the saucepan from the heat.

7. After the first hour of cooking, add 8 to 10 unlit charcoal briquettes and the remaining 2 hickory chunks (drained) to the fire. At the same time, lightly baste the ribs with some mop. Leaving the lid off for a few minutes while you baste the ribs will help the new briquettes to light. Close the lid and cook for another hour. During that time, maintain the temperature of the grill between 250° to 300°F by opening and closing the top vents.

8. After 2 hours of cooking, add 8 to 10 unlit charcoal briquettes to the fire. Remove the ribs from the rib rack, spread them out on clean work area and baste them thoroughly with some mop. Put them back in the rib rack, again all facing the same direction, but this time turned over so that the ends facing down earlier now face up. Also position any ribs that appear to be cooking faster than others toward the back of the rib rack, farther from the charcoal. Let the ribs cook for a third hour. During that time, maintain the temperature between 250° to 300°F by opening and closing the top vents.

9. After 3 hours of cooking, check if any rack is ready to come off the grill. They are done when the meat has shrunk back from most of the bones by 1/4 inch or more. When you lift a rack by picking up one end with tongs, the rack should bend in the middle and the meat should tear easily. If the meat does not tear easily, continue to cook the ribs. The total cooking time could be anywhere between 3 to 4 hours. Not all racks will cook in same amount of time. Lightly brush the cooked ribs with some sauce and, if desired for crispiness, cook them over direct heat for a few minutes. Transfer to a sheet pan and tightly cover with aluminum foil. Let rest for 10 to 15 minutes before serving. Serve warm with the remaining sauce on the side.

Labels: , , , , , , , ,

Thursday, July 01, 2010

Recipes: The Mexican - American Flag Cocktail

This came into my e-mail the other day and while it was originally created to honor Mexico's independence, this drink will work just as well as a salute to America's. It took me awhile to figure this concoction out, but it was worth it. Try this out on The Fourth. Viva America!

Mexican - American Flag Cocktail by Riazul

If you find yourself in south of Señor Frogs on Cinco de Mayo, the traditional drink recipe you’ll encounter is the Coctel Bandera Mexicana. Representing the colors of the namesake Mexican Flag, the cocktail trio includes blanco tequila (white), sangrita (red) and lime juice (green) in three separate “caballitos”(Basically brandy snifters)... sipped alternately.

Riazul Premium Tequila, whose heritage dates back to the Mexican War of Independence, would like to toast its northern neighbors on their Independence Day with an adapted flag cocktail… Bandera Americana: the American Flag cocktail.

The trio includes a small glass of Riazul Premium Silver followed by a traditional sangrita based on a generations-old Jalisco recipe, then chased with a blue margarita. Raise the flag to this tequila trifecta!

Ingredients:

Red —Sangrita:
  • (1 Lt, approximately)
  • 2 lb Raw tomatoes, peeled and seeded
  • 3 Freshly squezeed orange juice
  • 2 Freshly squezees lime juice
  • 1 Small onion, chopped
  • 1 teaspoon of sugar
  • Salt to taste
  • 6 Serrano peppers (fresh-raw)
White — Tequila:
  • 1 bottle of Riazul Premium Silver (blanco)
Blue — Margarita:
  • (per cocktail)
  • 2 oz Riazul Silver
  • 1 oz Blue Curacao
  • ½ oz Triple Sec
  • 1 oz lime juice
  • ½ tsp simple sugar
  • Sea salt
Directions:
Mix all of the sangrita ingredients together and serve cold in caballitos with corresponding shots of tequila.

Rub rims of cocktail glasses with lime juice. Dip rim in coarse salt. Shake tequila, blue curacao, triple sec, simple sugar and lime juice with ice, strain into the salt-rimmed glasses, and serve.

Labels: , , , , , , ,

Tuesday, April 27, 2010

BBQ Recipes: Grilled Orange Chicken The WhiteTrash Way

I told about the orange chicken.
You know the bbq that was really grillin'
Well here's another version to try
And still look the author in the eye
Looking through a glass onion
Oh yeah!
So I told you about Charbroil's version of BBQ Orange Chicken. Well I liked the recipe as printed a lot. But I felt it was missing some depth and body, so here's my version of...

Grilled Orange Chicken - The White Trash Way
My modifications are in red. Tell me - does this qualify as a new recipe?

2 1/2lbs chicken parts

Sauce Ingredients:
  • 1/4 cup vegetable oil
  • 1/4 cup frozen orange juice concentrate
  • 1/2 cup white wine vinegar
  • 1/4 cup tomato paste
  • 1/2 Tsp of ground ginger
  • 1 Tsp of dried onion powder
  • 1/2 cup water
  • 2 Tbsp butter
  • Kosher Salt to taste
  • Fresh ground pepper to taste
  • Zest of one orange
Cooking Instructions:
  1. Light a chimney of charcoal. Meanwhile prepare your grill for a two zone cook. (Don't know what that is - well it will be detailed in a future post.)
  2. In a medium bowl, mix together all sauce ingredients except salt and pepper, until smooth.
  3. Place sauce in a small sauce pan and bring to a boil. Boil for one minute and reduce heat to a simmer. I usually do this on my stove - yes, it is gas powered.
  4. Let sauce simmer and reduce until it thickens to a light syrup.
  5. Once the sauce is thick - taste it carefully it could burn your lips. Adjust the seasoning by adding salt and pepper to taste.
  6. Once your charcoal in the chimney is lit, place it on the hot zone of the grill. Let the grill come to a medium heat.
  7. Lightly oil your grill grates.
  8. Lightly salt and pepper your chicken
  9. Place chicken pieces on grill away from heat, skin side down and cook 20 minutes.
  10. Turn chicken, and grill for 10 additional minutes.
  11. Brush chicken with sauce and turn occasionally cooking for an additional 10 minutes.
  12. Place chicken over direct heat and to char and crisp the skin and sauce. Turning frequently. Do not walk away - This sauce has a lot of sugar and will burn easily.
  13. Let rest 5 minutes and serve.
Give it a shot both ways. I think you'll enjoy my modifications to the original recipe.

Labels: , , , , , , ,

Friday, April 23, 2010

BBQ Recipes: Grilled Orange Chicken


I admit it. Grilled chicken is easily and by far my favorite food on the grill. Crispy skin. Sweet sauce. Tender juicy meat. Seared and charred skin. I could eat grilled chicken almost every meal and still be a happy camper. My family - ehh. Not so much. Part of the problem is that I like - love my grilled chicken to be swamped in sauce. The family - ehh, not so much. We need to find a compromise.

Towards that end, I've been playing with various barbecue sauces lately and I came across an interesting one. It's called BBQ Orange Chicken from the book Everybody Grills by Charbroil. I enjoy this book, but be warned, it is very much gas grill focused. Recipes from this book will need to be adjusted for cooking on the only true barbecue grill - wood and charcoal.

Notice that I changed the name to Grilled Orange Chicken as we are instructed to grill our chicken, not barbeque it. This recipe produces a light and refreshing very orange tasting barbecue sauce that is a nice departure from the bottled stuff. Enjoy!

BBQ Orange Chicken
2 1/2lbs chicken parts

Sauce Ingredients:
  • 1/4 cup vegetable oil
  • 1/4 cup frozen orange juice concentrate
  • 1/2 cup white wine vinegar
  • 1/4 cup tomato paste
  • Zest of one orange
Cooking Instructions:
  1. Preheat grill to high, if using a gas grill.
  2. In a medium bowl, mix together all sauce ingredients until smooth.
  3. Reduce heat to medium on one side of the grill and turn off the heat on the other side.
  4. Place chicken pieces on grill away from heat, skin side down and cook 15 minutes.
  5. Turn chicken, and grill for 10 additional minutes. Brush chicken with sauce and turn occasionally cooking for an additional 10 minutes.
  6. Let rest 5 minutes and serve.
Up next, I'll talk about my additions and modifications of this recipe. "Turn off one side of the grill." Sheesh! Sorry for the excessive blue tones in the picture. It's a new camera and I'm finding its features. Did you know not to have the camera set to incandescent light while photographing in the sun? I didn't. I didn't even know it was an option. Live and learn.

Labels: , , , , , ,

Thursday, April 22, 2010

BBQ Recipes: Owensboro Barbecued Mutton

Ladies and Gents, children of all ages, here is the amazing losing recipe that produced such spectacular results at The Lamb Takedown on Sunday April 18! This recipe lost, not due to any lacking on its part - this will produce spectacular lamb. It lost due to my incompetence as a presentation chef. I highly recommend this recipe and believe me, I will be cooking this again.

I've added some comments of my own which are in parenthesis to reflect my cooking methods and style.

Owensboro Barbecued Mutton from the book BBQ USA by Steven Raichlen. Published by Workman Publishing Company708 Broadway, New York, New York. This recipe serves 8 to 10.


Method: Indirect Grilling (aka barbeque)

For the Mutton (or Lamb):
  • 1 piece of mutton (or lamb) shoulder or leg. (About 5lbs) I used 5 lamb shoulders that averaged about 2.7 lbs each.
  • Coarse salt (Kosher or sea - I used Kosher) and freshly ground black pepper
For the Basting Sauce:
  • 1 cup cider vinegar
  • 2/3 cup Worcestershire sauce (I used Lea & Perrins, which in my mind is the only Worcestershire sauce to use. I've never tasted a better one.)
  • 5 tablespoons course salt (Kosher or sea - in this case I used sea due to the fact that I was low on Kosher salt after salting all 5 shoulders)
  • 2 tablespoons fresh lemon juice
  • 1/2 teaspoon freshly ground black pepper.
For the Dipping Sauce:
  • 1/4 cup Worcestershire sauce (see comment above)
  • 1/4 cup cider vinegar
  • 2 tablespoons fresh lemon juice
  • 1 1/2 teaspoons brown sugar (I used Sugar in the Raw instead, which is a natural cane turbinado sugar. For some reason my brown sugar had been mixed with cinnamon and that wasn't the flavor I wanted.)
  • 1 teaspoon freshly ground black pepper
  • 1/2 teaspoon coarse salt (Kosher or sea)
  • 1/2 teaspoon onion salt
  • 1/2 teaspoon garlic powder
  • 1/4 teaspoon MSG (optional) (I didn't use this. I don't have any MSG in the house)
  • 1/4 teaspoon ground allspice
10 t0 12 hamburger buns or 20 to 24 slices white bread. (I used tortillas)

You'll also need:
  • 4 cups wood chips or chunks, preferably hickory, soaked for 1 hour in water to cover, then drained. (Soaking wood is such a fallacy. I'll address that in another post! - I used a mixture of apple and hickory woods with charcoal.)
Cooking Instructions:
  1. Generously season the mutton (or lamb) with about 1 tablespoon of each salt and pepper. Set aside
  2. Make the basting sauce: Combine the vinegar, Worcestershire sauce, salt, lemon juice and pepper with 1 1/2 cups water in a non-reactive saucepan and bring to a boil over high heat. (Water? Where did that come from? Why isn't it in the list of ingredients?)
  3. Make the dipping sauce: Combine the Worcestershire sauce, vinegar, lemon juice, brown sugar, pepper, coarse and onion salts, garlic powder, MSG (if using), allspice and 2 cups water in a non-reactive saucepan and bring to a boil over high heat and cook until richly flavored and slightly reduced, about 5 minutes. Transfer the sauce to a nonreactive serving bowl to cool.
  4. Set up the grill or smoker. (Now I'm going to vary from Steven's instructions here. This should have been your FIRST step. Setup your smoker and bring it to a temperature of 225 - 250 for at least one hour before placing your meat on the cooker. If you want to know how Steven does it - buy the book. This blog focuses on charcoal and wood grilling and barbecuing. I'll do some posts on setting up the various grills later in the spring)
  5. When your cooker has locked in on its temperature, place the mutton (or lamb) fat side up in the center of the cooking grate over a drip pan and away from the heat. Cover the grill. Cook the mutton (or lamb) until it is fall off the bone tender, 4 to 6 hours. (Mine cooked for 8 hours! Barbecue does not tell time.) To test for doneness, insert an instant read thermometer into the thickest part of the meat, being sure not to touch the bone. The internal temperature of the meat should be about 190 degrees. (When the meat is ready, the thermometer should enter the meat as if going into warm butter - there should be almost no resistance.)
  6. Baste the mutton (or lamb) with the basting sauce every half hour (after the bark has set on the meat) If the meat starts to burn, cover it loosely with aluminum foil. Keep your temperature steady, refueling your cooker as needed. (Steven has some instructions on refueling a charcoal grill, but I find them to be off)
  7. Transfer the cooked mutton (or lamb) to a cutting board and let rest for at least 5 minutes. (I'd recommend at least an hour) Slice the meat thinly across the grain or finely chop it with a cleaver.
  8. Spoon half of the dipping sauce over the meat.
  9. Serve the mutton (or lamb) on toasted or grilled hamburger buns or slices of white bread, or all by itself, passing the remaining dipping sauce on the side.
So, there you have it. Owensboro Barbecued Mutton. Damn good if I do say so myself.

Since I was making 5 times the amount of meat that this recipe called for, I increased the size of all the ingredients, except the salt. Be careful when doubling or tripling seasonings. Some, like salt and pepper don't double precisely. Doubling the salt may cause it to overpower a recipe. I've got to find some good charts on that.

Please try this recipe at home. I'm sure you'll love it.

Labels: , , , , , , , ,

Friday, April 09, 2010

This recipe comes to us from the fine folks at Weber. It's written by one of the Northeast's best barbecue cooks Jamie Purviance from his book, Weber’s On the Grill: Steak & Sides™

Bone-In Rib-Eye Steaks with Sweet, Pan-Roasted Garlic
Serves: 4
Prep time: 10 minutes, plus about 20 minutes for the garlic
Grilling time: 6 to 8 minutes

  • 25 garlic cloves, peeled
  • 1/8 teaspoon crushed red pepper flakes
  • 1/2–1 cup extra-virgin olive oil
  • 4 bone-in rib-eye steaks, each 10 to 12 ounces and about 1 inch thick, trimmed of excess fat
  • Sea salt
  • Ground black pepper
1. In a small saucepan over low heat, combine the garlic and red pepper flakes with 1/2 to 1 cup of oil, making sure you have enough oil to cover the garlic cloves. Cook at a low simmer until the garlic starts to brown, about 20 minutes. Remove the pan from the heat and allow the garlic to cool in the oil. The garlic will continue to soften and brown until the oil cools. Set aside.

2. Pour 1/4 cup of the garlic oil onto a sheet pan. Dredge the steaks through the oil, coating both sides. Season evenly with salt and pepper. Allow the steaks to stand at room temperature for 15 to 30 minutes before grilling.

3. Prepare the grill for direct cooking over high heat (450° to 550°F).

4. Brush the cooking grates clean. Grill the steaks over direct high heat, with the lid closed as much as possible, until cooked to your desired doneness, 6 to 8 minutes for medium rare, turning once or twice (if flare-ups occur, move the steaks temporarily over indirect heat). Remove from the grill and let rest for 3 to 5 minutes.

5. Serve the steaks warm, topped with a generous sprinkling of salt and some garlic. Spoon some of the garlic oil over the steaks, if desired.

Labels: , , , ,

Friday, March 19, 2010

Mac and Cheese at The Waterfront Ale House

I still have a lot to talk about with our meal from The Waterfront Ale House, but today I'm going to skip around a little in our menu and talk about what was probably the most controversial dish of the night - the Macaroni and Cheese. Que scary stabbing music now.

Yes folks, the macaroni and cheese was the most talked about dish on the menu at the Ale House. "Why?" You ask. Simply because it wasn't your traditional orange powder cheese sauce. As mac and cheese go, this is a very light version which works perfectly as a side dish. Its flavors won't overwhelm the main entree.

Sam and Ralph's Macaroni and Cheese is a home made version using Adams Reserve New York Extra Sharp Cheddar and elbow noodles. This ain't nothing like what you get out of that blue box and it ain't nothing like your mama used to make. Hence the controversy. Either you love this or you hate it.

But you know what? This mac and cheese is exactly like MY momma used to make. And my wife still makes it this way. I love it. It's nowhere near as gooey or chessey as what you get from the box, it doesn't involve a bechamel sauce and it comes together relatively quickly.

Here's what you do - dump one pound of cooked elbow macaroni into a buttered baking dish. Stir in one can of Campbell's condensed Cream of Mushroom Soup. Stir in one teaspoon dried mustard. Add in one pound of shredded extra sharp cheddar cheese. Add up to one half pound of an additional easy melting cheese - use whatever you have on hand. Mix thoroughly. Top with flavored bread crumbs. Arrange pats of butter on top and bake until bubbly.

Now I don't think that's Sam and Ralph's recipe, but it sure is a good copy. Enjoy.

Labels: , , , ,

Thursday, December 24, 2009

BBQ Recipes: Prime Rib

Here's a great link to a recipe and video on how to prepare Prime Rib on our grill for your Christmas dinner. Take a look over at Fire Cooker. Dr. BBQ walks you through making the beautiful roast pictured on the right. It couldn't be simpler.

Want more prime rib recipes? Well they can be found here at WhiteTrash BBQ. Just follow the links.
Don't care to cook it yourself? Check out Fiorella's Jack Stack BBQ. They'll send you out a perfectly cooked Prime Rib Roast with all the sides for only $149.95 plus tax and shipping.

Happy Eating Folks!

Labels: , , , , , , , , ,

Saturday, December 19, 2009

Grilling Recipes: Filet Mignon Crostini with Balsamic Onion Jam


Filet Mignon Crostini with Balsamic Onion Jam
Recipe by Jamie Purviance for Weber

Serves: 10 to 12
Prep time: 20 minutes, plus about 45 minutes for the jam
Grilling time: 13 to 16 minutes

Jam
2 tablespoons unsalted butter
2 tablespoons extra-virgin olive oil
2 large sweet yellow onions, about 12 ounces each, thinly sliced
1/2 teaspoon kosher salt
1/2 cup balsamic vinegar (not aged)
1/2 cup packed light brown sugar
1/4 cup dried currants or raisins

Crostini

1 baguette, cut into 25 slices, each about 1/2 inch thick
Extra-virgin olive oil
2 garlic cloves, peeled

3 filet mignon steaks, each about 8 ounces and 1-1/2 inches thick
1 tablespoon extra-virgin olive oil
1-1/2 teaspoons kosher salt
3/4 teaspoon ground black pepper

Cream
1/2 cup sour cream
1/4 cup prepared horseradish
1/4 teaspoon kosher salt
1/2 teaspoon ground black pepper

1 bunch fresh chives (optional)

1. In a large skillet over medium-high heat, warm the butter and olive oil. Add the onions and salt. Cook until they become translucent and have reduced in volume by half, about 10 minutes, stirring frequently to prevent burning. Stir in the vinegar, sugar, and currants. Reduce the heat to medium-low and cook until the onions become jam-like and most of the liquid has evaporated, about 35 minutes. Remove from the heat and let cool to room temperature. The jam will thicken as it cools.

2. Prepare the grill for direct cooking over medium heat (350° to 450°F).

3. Lightly brush one side of the baguette slices with oil and grill them over direct medium heat until toasted, 1 to 2 minutes (grill one side only). Allow to cool, and then rub the grilled sides lightly with the garlic.

4. Lightly brush the steaks with the oil and season with the salt and pepper. Allow to stand at room temperature for 15 to 30 minutes before grilling.

5. In a small bowl combine the cream ingredients. Cover and refrigerate until ready to use.

6. Grill the steaks over direct medium heat, with the lid closed as much as possible, until cooked to your desired doneness, 12 to 14 minutes for medium rare, turning once or twice (if flare-ups occur, move the steaks temporarily over indirect heat). Remove the steaks from the grill and let rest for 3 to 5 minutes. Cut the steaks into 1/4-inch slices.

7. Spread a layer of jam on each piece of toasted baguette (crostini). Place a slice of meat on the jam and top with a small dollop of the horseradish cream. Sprinkle with chopped fresh chives, if desired

Labels: , , , , ,

Friday, November 27, 2009

Leftover Turkey Pot Pie Recipe

Looking for something to make with all that left over turkey? Here's one of my favorites, Leftover Turkey Pot Pie. It's really simple and filling. I do cheat and use pre-made pie crusts from the store, but hey, I never liked baking anyway.

Leftover smoked turkey makes a great pot pie as well.Feel free to change up the vegetables; leftover string beans, broccoli and/or corn make great additions. I even tried it once with left over glazed carrots! You can see some corn in the picture below. It's from a pie I made last year.

Ingredients
  • 1 package pre-made refrigerated pie crusts enough for a (10 inch) double crust pie (Not the pre-made pie shells - buy the sheets)
  • 4 tablespoons butter, divided
  • 1 small onion, minced
  • 2 stalks celery, chopped
  • 2 carrots, diced
  • 3 tablespoons dried parsley
  • 1 teaspoon dried oregano
  • salt and pepper to taste
  • 2 cups chicken or turkey broth
  • 3 potatoes, peeled and cubed
  • 1 1/2 cups cooked turkey cut up
  • 3 tablespoons all-purpose flour
  • 1/2 cup milk
Directions

  1. Preheat oven to 425 degrees F . Roll out bottom pie crust, press into a 10 inch pie pan, and set aside.
  2. Melt 2 tablespoons butter in a large skillet over medium heat; add the onion, celery, carrots, parsley, oregano, and salt and pepper. Cook and stir until the vegetables are soft. Stir in the broth. Bring mixture to a boil. Stir in the potatoes, and cook until tender but still firm.
  3. In a medium saucepan, melt the remaining 2 tablespoons butter. Stir in the turkey and flour. Add the milk, and heat through. Stir the turkey mixture into the vegetable mixture, and cook until thickened. Cool slightly, then pour mixture into the unbaked pie shell. Roll out the top crust, and place on top of filling. Flute edges, and make 4 slits in the top crust to let out steam.
  4. Bake in the preheated oven for 15 minutes. Reduce oven temperature to 350 degrees F (175 degrees C), and continue baking for 20 minutes, or until crust is golden brown.

Labels: , , ,

Tuesday, November 17, 2009

How to Brine a Turkey

The fine folks over at Cookshack, bless their hearts, released a video on how to brine a turkey just in time for thanksgiving. The video starts a little slow as they show images of the corporate logo and then then the recipe card for the brine. Don't adjust your monitor, there really is no sound for about the first 30 seconds of the video.


This reminds me of school. Dry, dull and a little crazed, but the information is right on. The crotch shot is a hoot. Guys, hire a professional videographer next time!

Labels: , , , , ,

Wednesday, September 16, 2009

Grilling Recipe: Grilled Curried Albacore

Here at WhiteTrash BBQ, we receive all sorts of recipes in our mail. Most are useless and have nothing to do with live fire cooking, but sometimes a real gem comes along. Here's a great one.....

GRILLED CURRIED ALBACORE

Grilled Curried Albacore 1 lb. albacore loin
1 tbsp. olive oil
3 tbsp. lime juice
1 tsp. curry powder
½ tsp. grated ginger
1 tbsp. chopped red onion
1 tsp. honey
1 medium McIntosh apple, sliced thinly

Cut albacore loin into 1-inch thick medallions. Make the marinade by combining all other ingredients except the apple. Marinate the albacore covered glass dish for at least a half hour, turning once. Remove the medallions and reserve the marinade. Lay the albacore out on a hot grill; for most loins, 3-4 minutes on each side is sufficient. Baste generously with reserved marinade just before turning medallions over. Do not overcook -- albacore should be pink in the center when removed from heat. Serve over chilled apple slices.

Recipe and photo courtesy of Oregon Albacore Commission.

Labels: , ,

Saturday, September 12, 2009

BBQ Recipes: Slow-Smoked Spareribs with Sweet and Sour BBQ Sauce

From our friends at Weber....

Slow-Smoked Spareribs with Sweet-and-Sour Barbecue Sauce
Recipe from Weber’s Way to Grill™ by Jamie Purviance

rule

Serves: 8
Prep time: 30 minutes
Way to grill: indirect low heat (225° to 250°F)
Grilling time: 5 to 6 hours

Rub
3 tablespoons kosher salt
2 tablespoons pure chile powder
2 tablespoons light brown sugar
2 tablespoons granulated garlic
2 tablespoons paprika
4 teaspoons dried thyme
4 teaspoons ground cumin
4 teaspoons celery seed
2 teaspoons freshly ground black pepper

4 racks St. Louis-style spareribs

Mop
1 cup apple juice
1/2 cup apple cider vinegar
2 tablespoons Worcestershire sauce

5 fist-sized chunks hickory or apple wood (not soaked)

Sauce
2 cups ketchup
1 cup apple juice
2/3 cup apple cider vinegar
2 tablespoons Worcestershire sauce
2 tablespoons honey
2 tablespoons reserved rub

1. Prepare your smoker, following manufacturer's instructions, for indirect cooking over low heat.

2. In a medium bowl mix the rub ingredients. Set aside 2 tablespoons for the sauce. Season the ribs all over with the rub, putting more of it on the meaty sides than the bone sides.

3. In a small bowl mix the mop ingredients.

4. Smoke the spareribs, adding 2 wood chunks at the start of cooking and 1 chunk each hour after that, until the chunks are gone. Cook until the meat has shrunk back from the bones at least 1/2 inch in several places and the meat tears easily when you lift each rack, basting the ribs on both sides with the mop every 2 hours. The total cooking time could be anywhere between 5 to 6 hours. Not all racks will cook in same amount of time. Maintain the temperature of the smoker between 225° to 250°F by opening and closing the vents.

5. In a medium saucepan over medium heat, mix the sauce ingredients and cook for about 5 minutes. Remove the saucepan from the heat.

6. When the meat has shrunk back at least 1/2 inch in several places, lightly brush the ribs on both sides with sauce.

7. Cook the ribs for 30 to 60 minutes more. Remove them from the smoker and, if desired, lightly brush the ribs on both sides with sauce again. Then cut the racks into individual ribs. Serve warm with the remaining sauce on the side.

Labels: , , , ,

Google
WWW WhiteTrash BBQ
Your Gateway to Barbecue Information
A service of
netRelief, Inc.

This site is a member of The Smoke Ring
A linked list of BBQ websites

Next - Skip Next - Next 5 - Prev - Skip Prev - Random Site

Join the ring or browse a complete list of The Smoke Ring members

If you discover problems with any of The Smoke Ring sites,
please notify the Ringmaster


[ Previous 5 Sites | Skip Previous | Previous | Next ]

This RingSurf Food~n~More Ring Net Ring
owned by WhiteTrash BBQ.

[ Skip Next | Next 5 Sites | Random Site | List Sites ]

Search Popdex:
Ego Vereor Haud Sus!